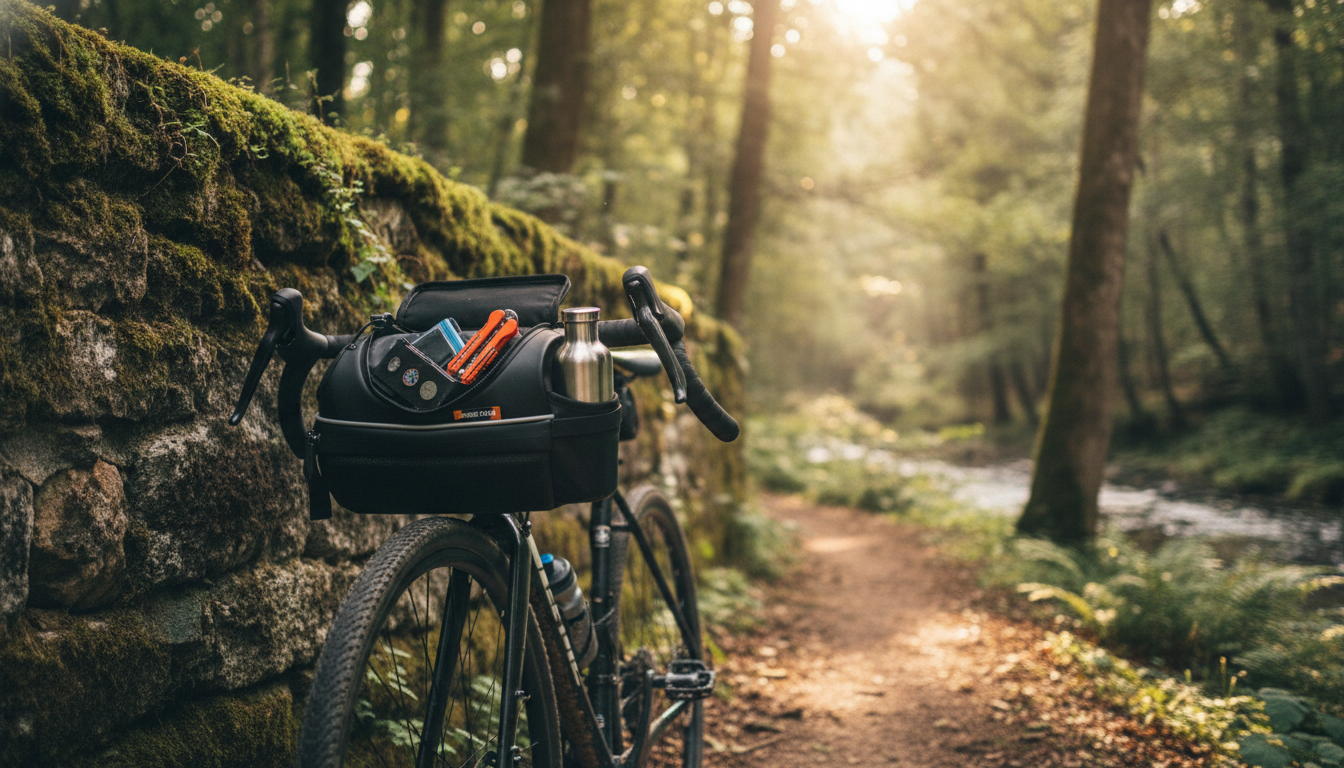
Waterproof Handlebar Bag with Bottle Holder and Tool Storage: A Practical Setup for Commuting and Gravel Rides
A handlebar bag that stays dry, keeps hydration within reach, and organizes repair essentials can simplify everything from daily commutes to long weekend rides. The most useful designs balance stable mounting, weather protection, one-handed access, and smart storage so items don’t rattle or shift when the road gets rough. For more guidance, see Geared Up: Just in Time for the Holidays.
What This Style of Handlebar Bag Is Built to Do
This “front-and-center” setup is designed for riders who want less in their pockets and fewer stops to dig through a backpack. It’s especially handy when the frame triangle is already crowded with other bags, a suspension layout, or limited bottle mounts. For further reading, see Packlist – Simply Cycling.
- Keep frequently used items accessible at the front of the bike: phone, keys, snacks, wallet, gloves, and mini pump.
- Add a dedicated bottle position when frame space is limited (small frames, full-suspension, or bikes with bags already installed).
- Separate “quick-grab” items from repair gear to prevent digging through loose tools mid-ride.
- Provide weather resistance for electronics and paper items during rain, road spray, and puddle crossings.
- Reduce pocket load for comfort on longer rides and warmer days.
Key Features That Matter Most on Real Roads
On smooth pavement, almost any bag can feel “fine.” The difference shows up when rain hits, potholes stack up, or the route turns to washboard gravel.
- Waterproofing approach: Waterproof fabric plus sealed seams or a rain cover; a water-resistant zipper alone may still allow seepage in heavy rain.
- Mount stability: Multiple attachment points (handlebar + head tube + optional fork crown/steerer strap) reduce sway on bumpy surfaces.
- Bottle holder security: Elastic retention, adjustable strap, or drawcord to prevent ejection over potholes; consider whether it fits standard cycling bottles.
- Tool storage layout: Internal sleeves or a dedicated compartment to keep a multitool, tire levers, CO₂/inflator, patch kit, and spare tube from clanking.
- Access while riding: Zipper pulls or a top flap that can be opened with one hand at safe moments; avoid designs that require full stop for every item.
- Visibility: Reflective accents and a front light mounting point help when the bag occupies typical light positions.
- Capacity vs. bulk: Around 2–3L often fits day-ride essentials without interfering with cables or knees.
If you’re refining ride feel as well as storage, tire pressure and contact patch can change how much the front end chatters over rough surfaces; resources like Bicycle Rolling Resistance can help you understand comfort and control tradeoffs.
Fit and Compatibility Checklist Before Buying
Front bags are all about “will it fit on my specific bike?” A few minutes of measuring and checking clearances can prevent annoying rub marks and steering interference.
- Handlebar diameter and shape: Confirm strap length and whether the mounting works with flat bars, drop bars, or aero profiles.
- Cable and hose routing: Check that the bag won’t pinch brake hoses or shift housing when turning the bars fully left/right.
- Head tube clearance: Ensure the bag doesn’t rub the head tube or interfere with a front brake cable loop.
- Front light and computer placement: Plan alternate mounting (out-front computer mount, light adapter) if the bag takes the usual space.
- Bottle position: Confirm bottle removal direction (upward vs. angled) and whether the bottle can be grabbed without hitting cables.
- Tire clearance and fender overlap: On smaller frames, a tall bag can contact the front tire when the fork compresses or during sharp steering.
- Accessory needs: Check for daisy chains or loops if adding a small lock, clip-on light, or bear spray (where legal).
How to Choose the Right Setup (Capacity, Weather, and Ride Style)
Choosing the right bag is less about maximum liters and more about matching structure, retention, and waterproofing to your typical rides.
Quick selection guide for a waterproof handlebar bag with bottle holder
| Use case |
Best capacity range |
Mounting priority |
Waterproof priority |
Bottle holder priority |
| Daily commute (30–60 min) |
1.5–3L |
Easy on/off + stable |
High (road spray) |
Medium–High |
| Gravel day ride |
2–4L |
Anti-sway (multi-strap) |
Medium–High |
High (secure retention) |
| All-day road ride |
1.5–3L |
Low profile + cable clearance |
Medium |
Medium |
| Wet-season touring |
3–5L |
Very stable + durable straps |
Very High (seals/cover) |
Medium–High |
Packing Ideas: What to Put Where
For a practical overview of tire and tube repair tools and what they do, Park Tool is a reliable reference for repair basics and terminology.
Mounting Tips for Stability and Safe Steering
Care and Maintenance to Keep It Waterproof
FAQ
Will a handlebar bag with a bottle holder affect steering?
Yes—any added weight on the bars increases steering inertia, especially at low speeds. Keeping tools low and close to the head tube, tightening stabilizer straps, and avoiding overpacking helps the front end feel more precise on rough terrain.
How waterproof are handlebar bags in heavy rain?
It depends on construction: waterproof fabric and sealed seams (or a well-fitted rain cover) typically outperform “water-resistant” zippers alone. In sustained storms, seams and zipper areas are common entry points, so a small internal dry pouch is a smart backup for electronics.
What tools fit best in a small front tool compartment?
Compact essentials include a multitool, tire levers, patches, a quick link, CO₂/inflator or a mini pump, and a spare tube. Using sleeves or a wrap reduces rattling and helps prevent abrasion from metal edges.
Recommended for you


Leave a comment