
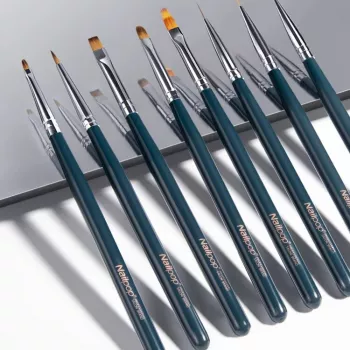
The best nail art brushes depend on the look you’re trying to create. Most designs can be done with a small set: a detail (liner) brush for thin lines, a flat or angled brush for crisp edges, and a dotting tool or stippling brush for accents. Choosing the right shape helps your polish or gel land exactly where you want it—without flooding the cuticle or dragging color across the nail.
Liner (striping) brush: A long, fine tip made for delicate outlines, swooshes, and clean stripes. It holds a controlled amount of product, which helps prevent shaky, broken lines.
Detail (fine) brush: Shorter than a liner and often slightly thicker. Use it for tiny petals, miniature hearts, crisp corners, and “fixing” small mistakes by pushing product back into place.
Flat brush: Great for block color, smoothing gel, and creating sharp French tips. The straight edge makes it easier to press color into a clean boundary.
Angled brush: A go-to for side-swept French tips, chevrons, and quick cuticle cleanup. The slanted edge gives you a natural guide for curved lines.
Ombre (fan or soft blending) brush: Designed to diffuse color gently. It’s ideal for gradients, aura nails, and soft transitions without harsh bands.
Dotting tool (not a brush, but essential): Perfect for polka dots, flower centers, and placing rhinestones or pearls with precision.
Look for firm-but-flexible bristles, a tip that snaps back into shape, and a handle that feels stable in your grip. Synthetic bristles are common for gel and polish because they’re durable and easier to clean. If you work with gel, avoid leaving brushes under direct light to prevent curing in the bristles.
For a clear, visual guide to brush shapes and what each one is best at, visit this nail art brush guide for clean lines and smooth curves.
Wipe off excess product right away, then use brush cleaner or a small amount of alcohol for polish-based products. For gel, use a gel brush cleanser and keep brushes away from UV/LED light to prevent curing.




Leave a comment